Bildbox 1 (klick hier)
![]()
Bildbox 1 (klick hier)
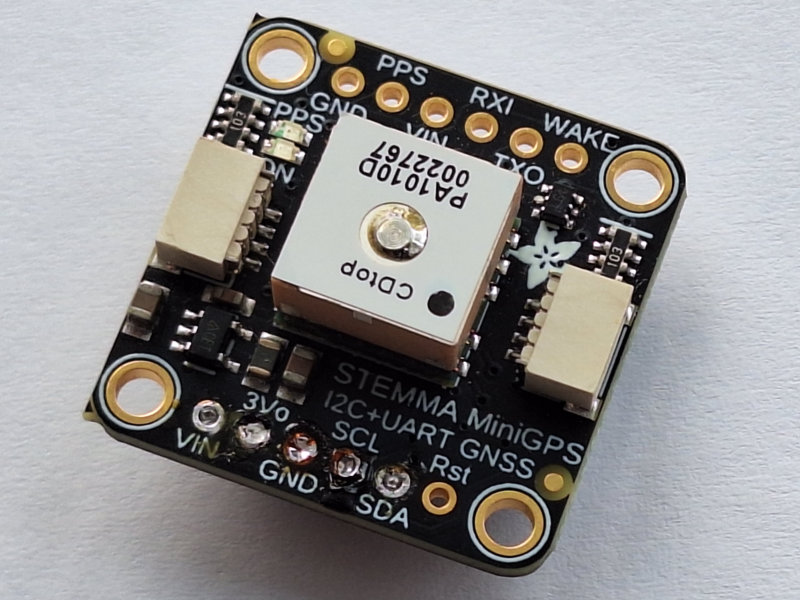
Es folgt hier noch eine Anleitung mit einem GPS-Modul am Pico-Geek, das oben gezeigte Stemma Mini GPS PA1010D von Adafruit. Das Modul hat zwei Stemma-QT
Buchsen. Die auf dem Bild (Bildbox 1)rechts zu sehende Buchse ist für den Anschluss am i2c-Bus. Die entsprechende Beschriftung befindet
sich auf der Rückseite.
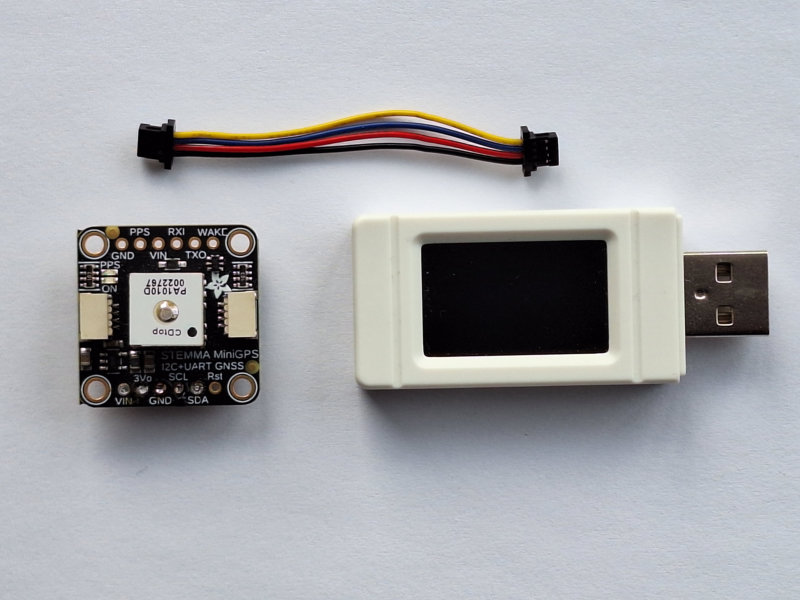
Wie im Beispiel mit dem Magnetsensor kann hier auch einfach das GPS-Modul am i2c-Port des Pico-Geek angeschlossen werden. Auf dem Bild 2 in Bildbox 2
von der Rückseite kann man sehen, dass sich hier eine Halterung befindet, für eine optionale CR1220-Knopfzelle, um die RTC am Laufen zu
halten und Warmstarts zu ermöglichen. Darauf werde ich später noch eingehen.
Bildbox 2 (klick hier)
Bei der Auswahl der Firmware entscheide ich mich auch hier für die CircuitPython- Version von Waveshare .
Hardware
- Pico-Geek (z.B. von Botland )
- Qwiic-Kabel mit 4-poligem Stecker(z.B. von Botland )
- Mini GPS PA1010D von Adafruit (z.B. von DigiKey )
Software
- aktuelle Firmware Adafruit CircuitPython; Waveshare RP2040-GEEK with rp2040
- library adafruit_gps.mpy aus dem CircuitPython-Bundle zur Firmwareversion
- Ordner adafruit_display_text aus dem CircuitPython-Bundle zur Firmwareversion
Los gehts
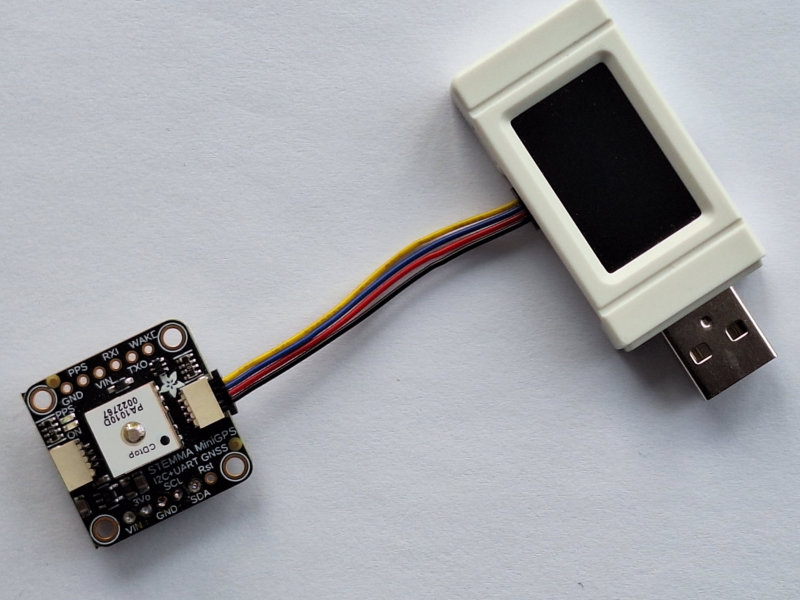
Verbinden Sie also das GPS Modul über das Qwiic-Kabel mit der Stemma-QT Buchse am Pico-Geek.
Wenn das erledigt ist, kann das GPS-Modul in Betrieb genommen werden. Als erstes führen wir einen Echotest durch. Der liefert einen rohen GPS-'NMEA-Satz', der vom Modul ausgegeben wird. Es gibt verschiedene Arten von NMEA-Sätzen. Die am häufigsten verwendeten sind die $GPRMC-Sätze (Global Positioning RecommendedMinimum Coordinates oder so ähnlich) und die $GPGGA-Sätze. Diese beiden liefern Uhrzeit, Datum, Breitengrad, Längengrad, Höhe, geschätzte Landgeschwindigkeit und Fixtyp. Der Fixtyp gibt an, ob das GPS die Satellitendaten erfasst und genügend Daten empfangen hat, um den Standort (2D-Fix) oder Standort + Höhe (3D-Fix) zu bestimmen.
Setzen Sie den Code aus dem unteren Kasten in die Thonny-IDE ein und starten ihn.
1   # SPDX-FileCopyrightText: 2021 ladyada for Adafruit Industries
2   # SPDX-License-Identifier: MIT
3
4   # Simple GPS module demonstration.
5   # Will print NMEA sentences received from the GPS, great for testing connection
6   # Uses the GPS to send some commands, then reads directly from the GPS
7   import time
8   import board
9   import busio
10  import adafruit_gps
11
12  i2c = busio.I2C(board.GP29, board.GP28)  # SCL, SDA
13  # Create a GPS module instance.
14  gps = adafruit_gps.GPS_GtopI2C(i2c, debug=False) # Use I2C interface
15
16  # Turn on the basic GGA and RMC info (what you typically want)
17  gps.send_command(b"PMTK314,0,1,0,1,0,0,0,0,0,0,0,0,0,0,0,0,0,0,0")
18
19  # Set update rate to once a second (1hz) which is what you typically want.
20  gps.send_command(b"PMTK220,1000")
21
22
23  # Main loop runs forever printing data as it comes in
24  timestamp = time.monotonic()
25
26  while True:
27      data = gps.read(32)  # read up to 32 bytes
28      print(data)  # this is a bytearray type
29
30      if data is not None:
31          # convert bytearray to string
32          data_string = ''.join([chr(b) for b in data])
33          print(data_string, end="")
34
35      if time.monotonic() - timestamp > 5:
36          # every 5 seconds...
37          gps.send_command(b'PMTK605')  # request firmware version
38          timestamp = time.monotonic()
Wenn Sie das Programm starten, werden die Rohdaten in der Kommandozeile der Thonny-IDE ausgegeben:
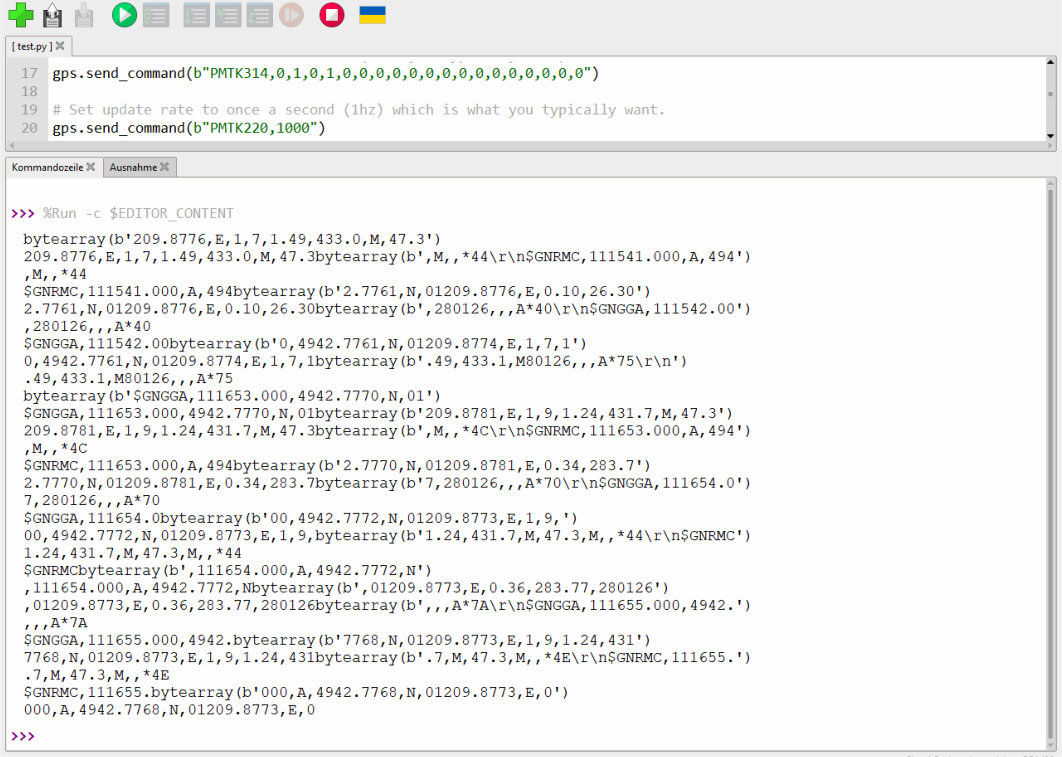
Bildbox 3 (klick hier)
Im nächsten Schritt führen wir ein s.g. 'GPS Parsing' durch. Das bedeutet auf deutsch so viel wie 'GPS-Datenanalyse' oder
'Auslesen von GPS-Daten'. Es beschreibt den Prozess, bei dem rohe NMEA-Datensätze (Zeichenketten) von einem GPS-Empfänger zerlegt,
strukturiert und in nutzbare Informationen wie Längen- und Breitengrade, Zeit oder Geschwindigkeit umgewandelt werden.
Im unteren Kasten ist der entsprechende Quellcode dafür:
Bildbox 3 (klick hier)
1   import time
2   import board
3   import busio
4   import adafruit_gps
5
6   i2c = busio.I2C(board.GP29, board.GP28)  # SCL, SDA
7   # Create a GPS module instance.
8   gps = adafruit_gps.GPS_GtopI2C(i2c, debug=False) # Use I2C interface
9
10  # Turn on the basic GGA and RMC info (what you typically want)
11  gps.send_command(b"PMTK314,0,1,0,1,0,0,0,0,0,0,0,0,0,0,0,0,0,0,0")
12  # Set update rate to once a second (1hz) which is what you typically want.
13  gps.send_command(b"PMTK220,1000")
14
15  # Main loop runs forever printing data as it comes in
16  timestamp = time.monotonic()
17  last_print = time.monotonic()
18
19  while True:
20      # Make sure to call gps.update() every loop iteration and at least twice
21      # as fast as data comes from the GPS unit (usually every second).
22      # This returns a bool that's true if it parsed new data (you can ignore it
23      # though if you don't care and instead look at the has_fix property).
24      gps.update()
25      # Every second print out current location details if there's a fix.
26      current = time.monotonic()
27      if current - last_print >= 1:
28          last_print = current
29          if not gps.has_fix:
30              # Try again if we don't have a fix yet.
31              print("Waiting for fix...")
32              continue
33          # We have a fix! (gps.has_fix is true)
34          # Print out details about the fix like location, date, etc.
35          print("=" * 40)  # Print a separator line.
36          print(
37              "Fix timestamp: {}/{}/{} {:02}:{:02}:{:02}".format(  # noqa: UP032
38                  gps.timestamp_utc.tm_mon,  # Grab parts of the time from the
39                  gps.timestamp_utc.tm_mday,  # struct_time object that holds
40                  gps.timestamp_utc.tm_year,  # the fix time.  Note you might
41                  gps.timestamp_utc.tm_hour,  # not get all data like year, day,
42                  gps.timestamp_utc.tm_min,  # month!
43                  gps.timestamp_utc.tm_sec,
44              )
45          )
46          print(f"Latitude: {gps.latitude:.6f} degrees")
47          print(f"Longitude: {gps.longitude:.6f} degrees")
48          print(f"Precise Latitude: {gps.latitude_degrees} degs, {gps.latitude_minutes:2.4f} mins")
49          print(f"Precise Longitude: {gps.longitude_degrees} degs, {gps.longitude_minutes:2.4f} mins")
50          print(f"Fix quality: {gps.fix_quality}")
51          # Some attributes beyond latitude, longitude and timestamp are optional
52          # and might not be present.  Check if they're None before trying to use!
53          if gps.satellites is not None:
54              print(f"# satellites: {gps.satellites}")
55          if gps.altitude_m is not None:
56              print(f"Altitude: {gps.altitude_m} meters")
57          if gps.speed_knots is not None:
58              print(f"Speed: {gps.speed_knots} knots")
59          if gps.speed_kmh is not None:
60              print(f"Speed: {gps.speed_kmh} km/h")
61          if gps.track_angle_deg is not None:
62              print(f"Track angle: {gps.track_angle_deg} degrees")
63          if gps.horizontal_dilution is not None:
64              print(f"Horizontal dilution: {gps.horizontal_dilution}")
65          if gps.height_geoid is not None:
66              print(f"Height geoid: {gps.height_geoid} meters")
Auch hier erfolgt die Ausgabe zunächst in der Kommandozeile der Thonny-IDE. Das Bild in der nächsten Bildbox veranschaulicht dies:
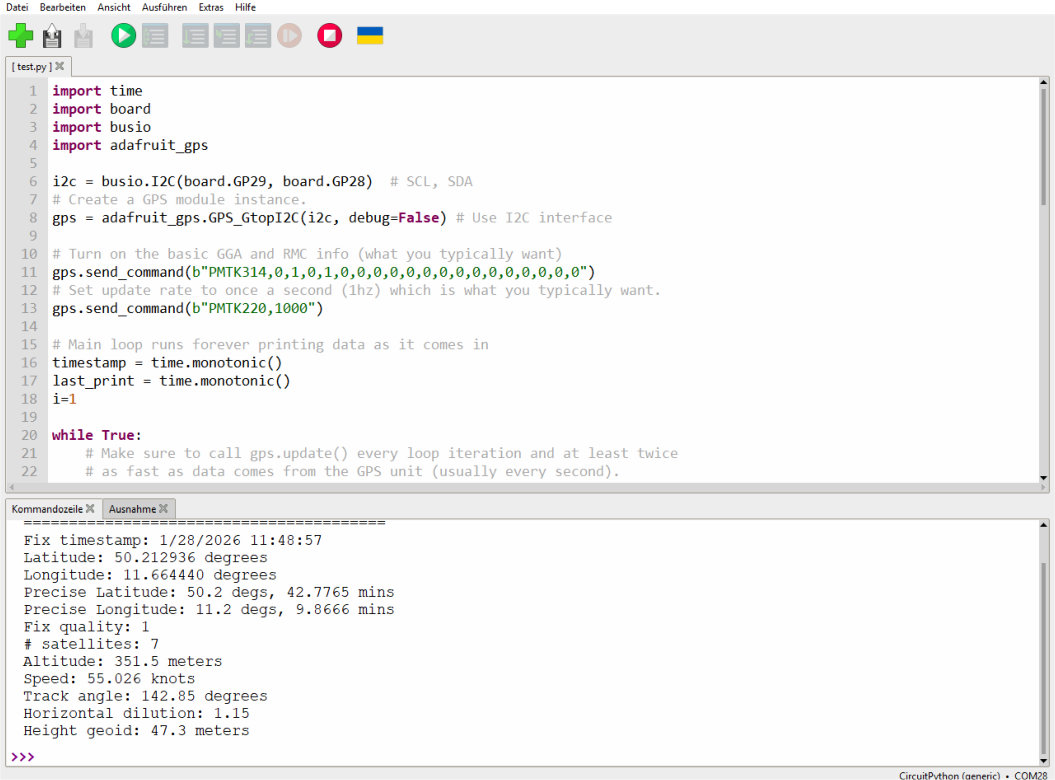
Bildbox 4 (klick hier)
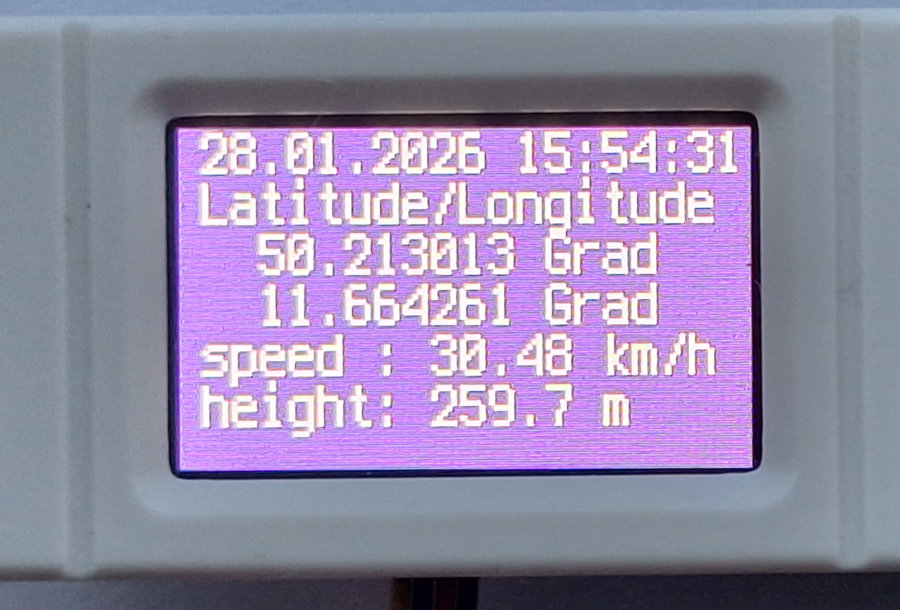
Nun soll eine kleine Anwendung mit der Ausgabe von Datum, Uhrzeit, Latitude, Longitude, Geschwindigkeit und Höhe auf dem Geek-Display entstehen.
Das wird in den Zeilen 1 bis 40 vorbereitet. Es wird wie bereits bekannt, das Display initialisiert, der i2c-Bus definiert und der Displayhintergrund
sowie Textausgabe vorbereitet. Die beiden Funktionen ab Zeile 42 und 49 dienen der formatierten Zuweisung von Datum und Uhrzeit aus den Satdaten. Bevor
ich den Quellcode angebe, möchte ich noch auf die Bedeutung von 'gps.has_fix' hinweisen.
Wenn die Spannungsversorgung am GPS-Modul hergestellt wird, erfolgt ein s.g. Kaltstart, der ohne aktuelle Satellitendaten
(Ephemeriden), auftritt. Dabei benötigt das Gerät 2 bis über 15 Minuten für den sogenannten TTFF (Time to First Fix), da es
Satellitensignale neu suchen muss. Für eine erfolgreiche Initialisierung ist eine freie Sicht zum Himmel zwingend erforderlich. Bei
vorhandener Batterie (siehe oben) wird ein Warmstart ausgeführt. Dieser ist effektiv, denn er verkürzt die
Wartezeit bei der Positionsbestimmung, da das Gerät nicht komplett neu initialisiert werden muss. Zu erkennen ist der 'Fix' am Blinken einer roten LED
neben der grünen Betriebsanzeige-LED. Auf dem Geek-Display erfolgt bis zum 'Fix' die Anzeige entsprechend Zeile 70 im Code.
Im nächsten Kasten sehen Sie jetzt den Code, den Sie in die Thonny-IDE kopieren können und unter 'code.py' abspeichern.
Die Zeilen 72 bis 79 bringen die genannten Anzeigen auf das Display. Natürlich können Sie die beliebig verändern. Experimentieren Sie ruhig
damit.
Bildbox 4 (klick hier)
1   # SPDX-FileCopyrightText : 2025 Detlef Gebhardt, written for 10.0.3 on 2025-10-17; Waveshare RP2040-GEEK with rp2040
2   # SPDX-FileCopyrightText : Copyright (c) 2025 Detlef Gebhardt
3   # SPDX-Filename          : RP2040 GEEK - GPS
4   # SPDX-License-Identifier: https://dgebhardt.de
5   import time
6   import board
7   import busio
8   import displayio
9   import terminalio
10  from adafruit_display_text import label
11  import adafruit_gps
12
13  # Display initialisieren
14  display = board.DISPLAY
15  display.rotation = 90
16  display.brightness = 1
17  main_group = displayio.Group()
18  display.root_group = main_group
19
20  i2c = busio.I2C(board.GP29, board.GP28)  # SCL, SDA
21  # Create a GPS module instance.
22  gps = adafruit_gps.GPS_GtopI2C(i2c, debug=False) # Use I2C interface
23  # Turn on the basic GGA and RMC info (what you typically want)
24  gps.send_command(b"PMTK314,0,1,0,1,0,0,0,0,0,0,0,0,0,0,0,0,0,0,0")
25  # Set update rate to once a second (1hz) which is what you typically want.
26  gps.send_command(b"PMTK220,1000")
27
28  # Make a background color fill
29  color_bitmap = displayio.Bitmap(display.width, display.height, 3)
30  color_palette = displayio.Palette(3)
31  color_palette[0] = 0x660088
32  color_palette[1] = 0x000000
33  color_palette[2] = 0xffffff
34  bg_sprite = displayio.TileGrid(color_bitmap, pixel_shader=color_palette, x=0, y=0)
35  main_group.append(bg_sprite)
36
37  label = label.Label(font = terminalio.FONT, text="Geek-GPS", color=0xffffff, scale=2, line_spacing=0.9)
38  text = displayio.Group(x=10, y= 10)
39  text.append(label)
40  main_group.append(text)
41
42  def _format_date(datum):
43      return "{:02}.{:02}.{}".format(
44          gps.timestamp_utc.tm_mday,
45          gps.timestamp_utc.tm_mon,
46          gps.timestamp_utc.tm_year,
47      )
48
49  def _format_time(zeit):
50      return "{:02}:{:02}:{:02}".format(
51          gps.timestamp_utc.tm_hour,
52          gps.timestamp_utc.tm_min,
53          gps.timestamp_utc.tm_sec,
54      )
55
56  # Main loop runs forever printing data as it comes in
57  timestamp = time.monotonic()
58  last_print = time.monotonic()
59
60  while True:
61      # Make sure to call gps.update() every loop iteration and at least twice
62      # as fast as data comes from the GPS unit (usually every second).
63      gps.update()
64      # Every second print out current location details if there's a fix.
65      current = time.monotonic()
66      if current - last_print >= 1:
67          last_print = current
68          if not gps.has_fix:
69              # Try again if we don't have a fix yet.
70              label.text = "\n\n\nWaiting for fix..."
71              continue
72          datum = _format_date(gps.timestamp_utc)
73          zeit = _format_time(gps.timestamp_utc)
74          if gps.satellites is not None:
75               label.text = (datum + " " + zeit +
76                            "\nLatitude/Longitude\n  {0:.6f} Grad".format(gps.latitude) +
77                            "\n  {0:.6f} Grad".format(gps.longitude) +
78                            "\nspeed : {} km/h".format(gps.speed_knots*1,852) +
79                            "\nheight: {} m".format(gps.altitude_m) )
Das Display sieht nach dem 'gps.has_fix' dann z.B. so aus:
Bildbox 5 (klick hier)
Viel Spass und Erfolg beim Ausprobieren.
Bildbox 5 (klick hier)
Viel Spass und Erfolg beim Ausprobieren.